Blog

  • Eyeliner Tattoo: Your Comprehensive Guide

    Imagine never having to apply eyeliner again, waking up with beautifully defined eyes every single day. This dream is becoming a reality for many thanks to the rising popularity of cosmetic tattooing. Eyeliner tattoo, often referred to as permanent eyeliner, offers a convenient and long-lasting solution for enhancing your eyes. This comprehensive guide will explore all facets of eyeliner tattooing, from its various styles and benefits to the procedure itself and crucial aftercare, helping you make an informed decision about this transformative beauty treatment.

    What is Eyeliner Tattoo (Permanent Eyeliner)?

    Eyeliner tattoo is a form of cosmetic tattooing, a specialized field within permanent makeup where pigment is expertly deposited into the dermal layer of the skin along the lash line. Unlike traditional body tattoos that use ink and penetrate deeper, cosmetic tattooing utilizes specific pigments designed for facial application, implanted at a shallower depth, and formulated to fade more gracefully over time while maintaining natural color. This process creates the appearance of perfectly applied eyeliner that is smudge-proof and waterproof, offering lasting definition to your eyes.

    Types of Eyeliner Tattoos: Finding Your Perfect Look

    The versatility of permanent eyeliner allows for various styles to suit different preferences and eye shapes. Understanding the options is key to achieving your desired aesthetic:

    • Lash Enhancement/Invisible Eyeliner: This subtle technique involves depositing pigment precisely between the individual lashes. The goal is to create the illusion of a fuller, darker lash line without a visible “line” of eyeliner. It’s ideal for those seeking a very natural look, subtle definition, or anyone new to permanent makeup.
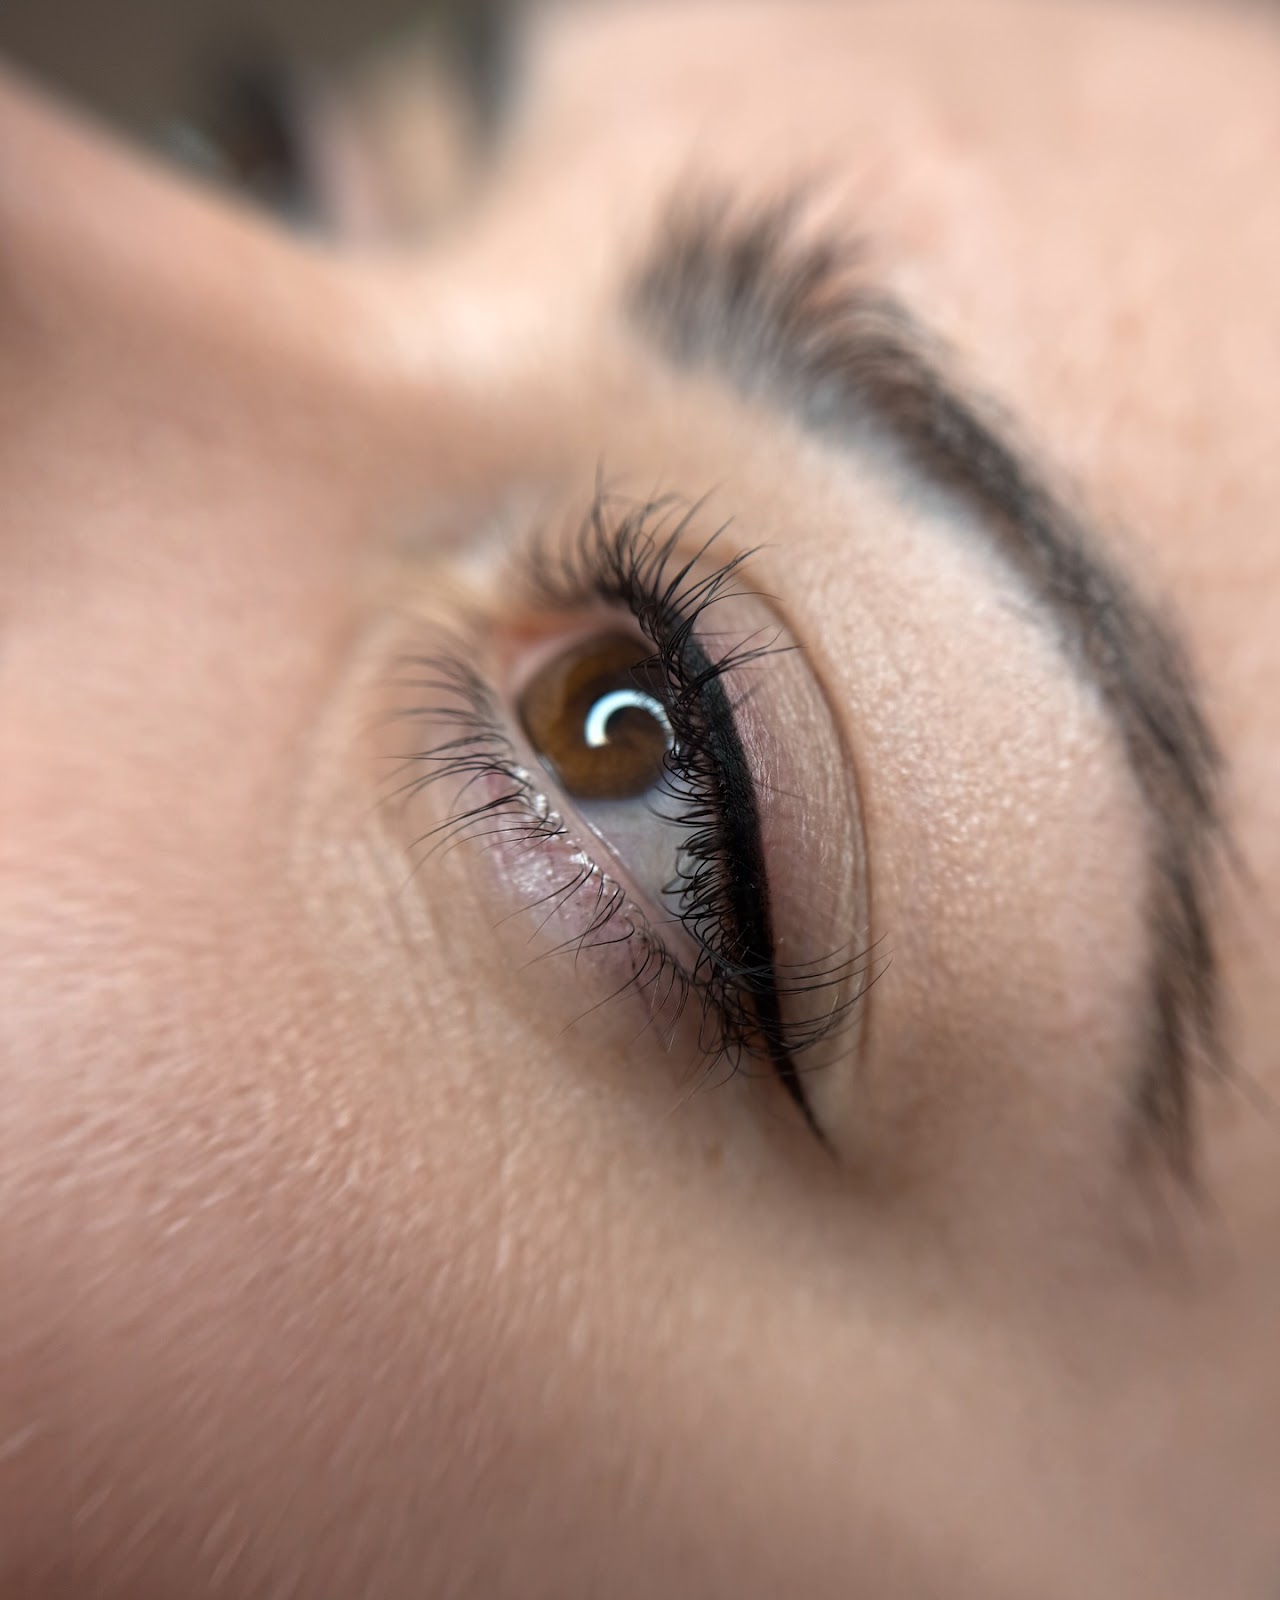
    • Thin/Classic Eyeliner: Mimicking the effect of a precisely applied liquid eyeliner, this style creates a thin, clean line just above the lash roots. It offers a well-defined yet understated look perfect for everyday wear and enhancing the eye’s natural shape.
    • Medium/Winged Eyeliner: For those who desire a more dramatic flair, a medium or winged eyeliner tattoo provides a thicker line, often extending into a subtle or prominent wing. This style is popular among cat-eye enthusiasts and offers increased intensity and a bolder statement.
    • Smudged/Soft Eyeliner: This technique creates a diffused, softer line, similar to the smudged effect of pencil eyeliner. It’s perfect for achieving a smokey eye effect or for individuals who prefer a less harsh, more blended look around their eyes.
    • Bottom Eyeliner: Pigment is applied to the lower lash line. While it can enhance definition, it’s crucial to consider that a heavy bottom liner can sometimes make eyes appear smaller. It’s often combined with a top liner to balance the features.

    The Benefits of Eyeliner Tattoo: Why Consider It?

    The appeal of a permanent eyeliner tattoo extends beyond mere aesthetics, offering a range of practical advantages:

    • Time-Saving: Eliminates the daily struggle and time spent applying eyeliner, streamlining your morning routine.
    • Convenience: Wake up with perfectly defined eyes, ready to go, regardless of your schedule.
    • Smudge-Proof & Waterproof: Ideal for active lifestyles, humid climates, swimming, or even emotional moments, ensuring your eyeliner stays flawless. You’ll enjoy no-smudge eyeliner that withstands anything.
    • Ideal for Allergies/Sensitivities: Reduces exposure to traditional makeup ingredients that can irritate sensitive eyes or trigger allergies, making it a great beauty benefits eyeliner tattoo.
    • Solution for Vision/Dexterity Issues: A true blessing for those with shaky hands, vision impairments, or medical conditions like arthritis, making precise application challenging.
    • Boosts Confidence: Enhances natural beauty and eye definition, providing a subtle yet significant confidence boost.

    The Eyeliner Tattoo Process: What to Expect

    Understanding the steps involved in getting a permanent eyeliner tattoo can help alleviate any concerns:

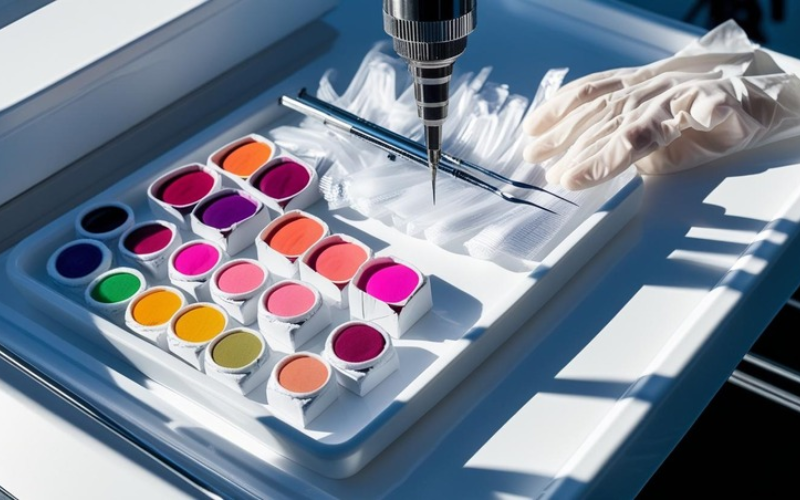
    • Consultation: This initial meeting is crucial. You’ll discuss your desired type of eyeliner tattoo, color preferences, and expectations. The artist will assess your eye shape, skin type, and check for any contraindications. Some artists may perform a patch test for allergies to pigments.
    • Preparation (Pre-Procedure): You’ll typically be advised to avoid caffeine, alcohol, and blood thinners 24-48 hours before the appointment to minimize bruising and bleeding. If you wear contact lenses, you’ll need to remove them before the procedure. Always arrive with clean, makeup-free eyes.
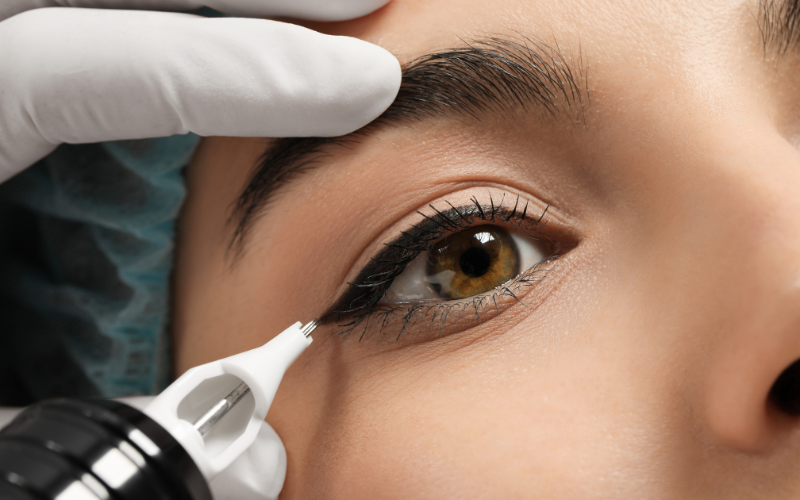
    • The Procedure Itself: Upon arrival, a topical numbing cream will be applied to ensure your comfort. Once numb, the artist will meticulously map and draw the design on your eyelids for your approval. Using a specialized cosmetic tattoo machine, the pigment is then skillfully implanted into the skin along the lash line. The duration of the session typically ranges from 1 to 2 hours, and while discomfort is usually minimal due to the numbing, you might feel a slight pressure or buzzing sensation.
    • Touch-Up Session: A follow-up touch-up session, usually scheduled 4-8 weeks after the initial procedure, is almost always necessary. This allows the artist to perfect the shape, intensify the color, and ensure the lasting quality of your permanent makeup eyeliner. It’s crucial for achieving the best results and maximizing longevity.

    Eyeliner Tattoo Aftercare: Maximizing Longevity & Healing

    Proper aftercare is paramount for optimal healing and the longevity of your liner. Eyeliner tattoo aftercare products play a vital role:

    • Immediate Aftercare (First 24-48 hours): Keep the treated area dry. Avoid water contact, steam, and excessive sweating. Gentle cold compresses can help reduce swelling. Absolutely avoid rubbing or scratching your eyes.
    • First 7-10 Days (Healing Phase): Your artist will provide specific instructions, which may include gentle cleansing (if advised) and applying a recommended aftercare ointment sparingly. Crucially, avoid all eye makeup on the treated area. Steer clear of direct sun exposure, swimming pools, saunas, and intense workouts. During this phase, you might experience mild swelling, redness, and some flaking or scabbing as the skin heals. Don’t be alarmed if the color appears darker initially and then seemingly fades; this is a normal part of the healing process as the true color emerges.
    • Long-Term Care: To maintain your semi-permanent eyeliner, embrace sun protection, wearing sunglasses outdoors, and applying an ophthalmologist-approved SPF specifically for the eyelids. Avoid harsh skincare ingredients like Retin-A, AHAs, or BHAs directly on the tattoo, as they can cause premature fading. Regular touch-ups every 1-3 years will refresh the color and definition.

    How Long Does Eyeliner Tattoo Last?

    An eyeliner tattoo typically lasts anywhere from 1 to 3 years, though this can vary significantly from person to person. Several factors influence its longevity, including your skin type (oily skin may fade faster), lifestyle, sun exposure, the quality of pigments used, and adherence to aftercare instructions. Over time, the color will naturally soften and fade, necessitating refreshers to maintain its crisp appearance.

    Potential Risks & Side Effects of Eyeliner Tattoo

    While generally safe when performed by a qualified eyeliner tattoo artist, it’s important to be aware of potential risks:

    • Swelling & Redness: Common and temporary, usually subsiding within a day or two.
    • Infection: Rare but possible with improper hygiene during the procedure or inadequate aftercare.
    • Allergic Reaction: To pigments, though rare, this is why a patch test may be recommended.
    • Scarring: Extremely rare when performed by an experienced and skilled technician.
    • Unsatisfactory Results: Poor shape, unevenness, or undesirable color are risks if you choose an inexperienced artist. This highlights the importance of thorough research.
    • MRI Complications: While very rare, some individuals with permanent makeup have reported mild sensations during MRIs. Always inform your radiologist if you have permanent makeup.  

    Cost of Eyeliner Tattoo: What to Budget For

    The permanent eyeliner cost can vary widely, typically ranging from $400 to $800 or more. This price fluctuates based on geographical location, the artist’s experience and reputation, and the complexity of the chosen eyeliner style. The initial price usually includes the first session and often a complimentary touch-up session. Remember to factor in the cost of future touch-ups for long-term maintenance, which are typically less expensive than the initial procedure.

    Choosing the Right Eyeliner Tattoo Artist: Your Key to Success

    Selecting a professional and reputable eyeliner tattoo artist is the most critical step in ensuring a beautiful and safe outcome:

    • Research & Portfolio: Look for an extensive portfolio showcasing numerous before & after photos of eyeliner tattoos in various styles. Assess if their style is consistent with what you desire. You can explore examples from a professional permanent makeup studio like Hivivi, where the artists specialize in a wide range of eyeliner techniques and consistently deliver beautiful, healed results.
    • Training & Certifications: Verify that the artist possesses proper training and certifications in permanent makeup and bloodborne pathogens.  
    • Hygiene & Sterilization: Observe the clinic’s cleanliness. The artist must use disposable needles, sterile tools, and follow strict hygiene protocols.
    • Client Reviews & Testimonials: Check online reviews and testimonials to gauge client satisfaction and the artist’s reputation.
    • Consultation: A professional artist will always offer a thorough consultation to discuss your needs, assess suitability, and address all your questions.
    • Trust Your Gut: Choose an artist with whom you feel comfortable and confident, and who clearly understands your aesthetic goals.

    Eyeliner Tattoo Removal/Correction

    While the goal is always a perfect result, options exist for correction or removal. Minor adjustments to color or shape can often be made through additional tattoo sessions. For more significant changes or complete removal, methods like saline removal or laser removal are available. However, these processes can be lengthy and costly. Therefore, choosing an experienced artist to prevent complications is always the best approach.

    Frequently Asked Questions (FAQs) About Eyeliner Tattoo

    • Does eyeliner tattoo hurt? Most clients report mild discomfort rather than pain, often describing it as a scratching or buzzing sensation. The application of a high-quality topical numbing cream significantly minimizes any discomfort.
    • Can I wear makeup after? No, you should typically avoid wearing any makeup on or near the treated area for at least 7-10 days, or until the area is fully healed. This prevents infection and ensures proper color retention.
    • Can I get it if I have sensitive eyes? Often, yes. Permanent eyeliner can be beneficial for those with sensitive eyes as it eliminates daily irritation from traditional cosmetics. However, a thorough consultation with your artist (and possibly your ophthalmologist) is crucial.
    • Will it look natural? Definitely. Depending on the type chosen, especially lash line enhancement, permanent eyeliner can look incredibly natural, simply creating the appearance of fuller, darker lashes without a heavy makeup look.
    • What if I don’t like it? Permanent eyeliner does fade over time, so if you are dissatisfied, the color will lighten. Options for correction (color adjustment, slight shape refinement) or removal (laser, saline) exist, though prevention is key.
    • Can I have an MRI with permanent eyeliner? Yes, generally. It is always wise to inform your radiologist about any permanent makeup you have before an MRI, although complications are rare.  

    Conclusion: Is Eyeliner Tattoo Right For You?

    Eyeliner tattoo offers an incredible solution for those seeking convenience, enduring beauty, and perfectly defined eyes without the daily hassle. From the subtle lash enhancement to a bold winged look, the possibilities are diverse. While the benefits are clear, it is paramount to consider all aspects, including the process, aftercare, and potential risks. The most crucial decision lies in choosing a highly skilled and reputable permanent makeup artist. Their expertise will ensure a safe procedure and results that truly enhance your natural beauty. Ready for perfect eyeliner?

  • How to Use a PMU Machine for Effortless Lip Tinting: Your Guide to Defined Lips

    The quest for beauty that simplifies rather than complicates a daily routine often leads to exciting innovations. Imagine waking up with perfectly tinted lips, requiring little more than a touch of gloss. This dream is becoming a reality for many thanks to permanent makeup (PMU) lip tinting, a semi-permanent cosmetic tattooing technique that enhances lip color and shape. 

    As interest in low-maintenance beauty solutions grows, understanding how to use a PMU machine for lip tinting has become a valuable skill for those passionate about enhancing natural beauty. This comprehensive guide provides insights into the process, from understanding your tools to mastering the art of application.

    Understanding Your PMU Machine: The Heart of Lip Tinting

    Types of PMU Machines for Lip Tinting

    At the core of any successful permanent makeup application is the right equipment. PMU machines come in various types, each with unique characteristics. Rotary machines are widely favored in modern PMU for their consistent power delivery and smooth operation, making them ideal for delicate areas like the lips. While coil machines exist, rotary devices offer a more controlled and less traumatic experience for the skin.

    When considering a permanent makeup device, decide between corded and cordless options. Corded machines provide continuous power, ensuring no interruptions during a procedure. Cordless machines offer superior mobility and flexibility, eliminating cord tangles and workplace limitations. Look for machine features such as adjustable needle depth, precise speed control, and low vibration, all of which contribute to a more comfortable and precise application.

    Essential Components of a PMU Machine Setup

    Beyond the machine itself, a complete setup includes several key components. The handpiece or pen is where the needle cartridge attaches, allowing for precise control. A reliable power supply is crucial for consistent voltage to the machine. Some setups include a foot pedal for hands-free activation, providing convenience during the application. Finally, various cables and connectors ensure all components are seamlessly linked, allowing for a smooth operation when using a PMU machine for lip tinting.

    Preparing for Perfection: Pre-Treatment Steps

    Client Consultation and Assessment (Professional & Self-Evaluation Perspective)

    Thorough preparation is paramount for successful and safe PMU lip tinting. Begin with a detailed assessment of the individual’s skin type—identifying whether it’s dry, oily, or combination. Evaluate the condition of the lips, noting any dryness, cold sores, or unusual textures. Discussing desired shape and color is essential to align expectations and achieve the ideal natural-looking lips. A review of medical history, including allergies, medications, or chronic conditions, helps identify any contraindications. Crucially, patch testing is a non-negotiable safety measure to check for allergic reactions to pigments or topical anesthetics.

    Setting Up Your Workstation (Hygiene is Key!)

    A sterile environment is non-negotiable in permanent makeup. Strict adherence to sterilization and cross-contamination prevention protocols protects both the practitioner and the client. This involves using disposable barriers and wraps on all surfaces and equipment that may come into contact with the client or pigments. Wearing fresh gloves and masks throughout the procedure creates a protective barrier. Proper lighting is also vital, ensuring clear visibility of the working area for precise application.

    Numbing and Pain Management

    To ensure comfort, topical anesthetics are applied to the lips before the procedure. Understanding the various types of numbing creams, their application techniques, and necessary wait times ensures optimal effectiveness. Offering additional client comfort tips, such as a stress ball or calming music, can further enhance the experience during the process of how to use a PMU machine for lip tinting.

    The Lip Tinting Process with a PMU Machine: Step-by-Step Guide

    Mapping and Shaping the Lips

    Precision mapping is the foundation of beautiful lip tattoo design. This involves using specialized pencils and stencils to create a precise outline that complements the individual’s facial features. While not strictly adhering to the “”golden ratio”” in all cases, aiming for symmetrical and aesthetically pleasing lines is key. Multiple symmetry checks from different angles ensure the design is balanced before any pigment is implanted.

    Needle Selection for Lip Tinting

    Selecting the correct permanent makeup needles is crucial for achieving desired results. Liner needles (e.g., 1RL, 3RL) are fine for creating crisp outlines and defining the lip border. Shader needles (e.g., 5Mag, 7Mag) are used for packing color and creating a soft, blended effect across the lips. Understanding appropriate needle depth ensures pigment is deposited in the correct skin layer for optimal color retention and minimal trauma.

    Choosing Pigments for Lip Blushing

    Pigment selection is an art. A deep understanding of color theory for lips is essential to choose shades that will heal beautifully and avoid undesirable undertones. Consider whether warm or cool tones will best complement the individual’s natural lip color and skin tone. High-quality lip blush pigments from reputable brands are vital for safety, vibrant color, and predictable healing. Professional guidance on how to use a PMU machine for lip tinting often includes extensive training on pigment science.

    The Application Technique: How to Use Your PMU Machine

    Proper technique is key to flawless pigment implantation. Hold the PMU machine comfortably and steadily, allowing for smooth, controlled movements. Various stretch techniques keep the skin taut, which enables cleaner lines and better pigment absorption. Layering and shading techniques build up color gradually, ensuring an even, saturated result without overworking the skin. Work in small sections, wiping excess pigment as needed, to maintain visibility and prevent unnecessary trauma to the delicate lip area. This systematic approach contributes to beautiful and long-lasting cosmetic tattooing.

    Post-Procedure Care: Ensuring Beautiful & Long-Lasting Results

    Immediate Aftercare

    The first few days post-procedure are critical for proper healing. Immediate aftercare involves gentle cleansing of the lips with a mild, fragrance-free cleanser. Applying a recommended soothing balm or ointment keeps the lips moisturized and protected. Swelling and bruising are common after lip tinting; applying a cold compress can help manage these temporary effects.

    Long-Term Aftercare & Healing Process

    Understanding the full healing process for lip blush is vital. Expect the lips to scab and flake, and the color to appear darker initially before softening and settling. Advise against certain foods and activities during healing, such as spicy foods, excessive sun exposure, and strenuous workouts. Consistent sun protection is paramount, even after healing, to prevent premature fading and maintain vibrant permanent lip color.

    Touch-Ups and Maintenance

    PMU lip tinting is a semi-permanent treatment, and touch-ups are usually needed to maintain optimal color and definition. Typically, an initial touch-up is recommended 6-8 weeks after the first session once the healing process is complete. Subsequent maintenance touch-ups may be required every 1-3 years, depending on individual skin type, lifestyle, and how well the color retains. These touch-ups are important to refresh the vibrant, defined lips.

    Safety First: Risks and Considerations

    Potential Risks and Complications

    While PMU lip tinting offers fantastic benefits, it is crucial to be aware of potential risks. These can include infection, allergic reactions to pigments or numbing agents, and, in rare cases, scarring. Individuals prone to cold sores (herpes simplex) should be aware that the procedure can trigger a flare-up, and prophylactic medication is often recommended.

    Importance of Professional Training or Supervision

    This detailed guide on how to use a PMU machine for lip tinting highlights the complexity and skill involved. Permanent makeup is a specialized field that demands extensive training, knowledge of anatomy, color theory, and sterile practices. Attempting self-tatting without proper training is highly discouraged due to the significant risks involved. For those seeking this beauty enhancement, finding a reputable and certified artist with a strong portfolio and excellent hygiene standards is paramount for safe and beautiful results.

    Your Journey to Defined Lips: A Self-Care & Beauty Investment

    PMU lip tinting is more than just a beauty procedure; it’s an empowering self-care investment. The confidence boost that comes with effortlessly defined lips and the time saved from daily makeup application can be truly transformative. 

    As you explore this path, reading insider tips from PMU professionals and beauty entrepreneurs – like those shared by Vivi, founder of a premium beauty brand—can offer valuable guidance and inspiration. Embracing beauty and self-care in a way that truly simplifies your routine can be a rewarding journey to beautifully enhanced features.

    Related Resources/FAQs Section

    • How long does lip tinting last?
      Lip tinting typically lasts 1 to 3 years, though results vary depending on individual skin type, lifestyle, sun exposure, and diligence with aftercare. Regular touch-ups help maintain the color.
    • Is lip tinting painful?
      Most individuals report minimal discomfort during the procedure due to the application of topical anesthetics. Sensations vary, but pain is generally manageable.
    • Can I get lip fillers after lip tinting?
      Yes, lip fillers can be done after lip tinting, but it is recommended to wait until the lips are fully healed (typically 4-6 weeks) after your PMU procedure to avoid affecting the pigment.
    • What’s the difference between lip tinting and traditional tattooing?
      PMU lip tinting uses specialized machines and pigments to implant color into the superficial layers of the skin, resulting in a soft, natural, and semi-permanent effect. Traditional tattooing uses different inks and targets deeper skin layers for permanent body art.
  • Lip Tattoo: Everything You Need to Know

    Tired of endlessly reapplying lipstick and liner? The dream of waking up with perfectly defined, beautifully colored lips is now a reality thanks to the rise of the lip tattoo. This form of permanent makeup has surged in popularity, offering a long-lasting solution for a flawless pout. Unlike a traditional body tattoo, modern cosmetic lip tattooing, especially the popular “lip blush” technique, focuses on enhancing your natural beauty with a soft, sheer wash of color. It’s a game-changer for anyone seeking convenience, symmetry, and a subtle confidence boost. This comprehensive guide will walk you through everything you need to know, from the procedure itself to the crucial healing process and long-term care for your newly tattooed lips.

    What is a Lip Tattoo? Defining Permanent Lip Makeup

    A lip tattoo is a cosmetic procedure that involves depositing colored pigment into the upper layer of your skin, the dermis, using a sterile, mechanized needle. This technique, also known as micro-pigmentation, is designed to enhance the color and shape of your lips. While the idea of a “tattoo” might bring to mind bold, heavy lines, modern cosmetic lip tinting is far more sophisticated and subtle.

    Key Differences: Lip Blush vs. Traditional Lip Tattoo

    The most sought-after procedure today is the lip blush tattoo. This technique gives your lips a soft, sheer tint, similar to the effect of a lip stain or a tinted balm. It focuses on adding a delicate wash of color and defining the lip border without harsh lines. In contrast, a traditional full lip color tattoo is more opaque and saturated, aiming to replicate the look of a solid lipstick. While still an option, most people now opt for the more natural and versatile results of lip blushing.

    Common Reasons People Get Lip Tattoos

    • To restore color to pale or aging lips.
    • To correct asymmetry and create a more balanced smile.
    • To define the lip border (vermilion border) that may have faded over time.
    • To create the illusion of fuller lips without injectables.
    • To enjoy smudge-proof, waterproof color 24/7 and save time on daily makeup.

    The Benefits of Getting a Lip Tattoo

    The advantages of a cosmetic lip tattoo extend beyond just aesthetics; they offer practical, everyday benefits that can simplify your routine and boost your self-esteem.

    Aesthetic Advantages

    A lip tattoo provides a subtle yet significant enhancement to your natural features. It can correct minor imperfections, restore a youthful flush of color, and provide crisp definition to your lip line. The result is fuller-looking, perfectly symmetrical lips that look great with or without additional makeup. It’s your natural beauty, simply enhanced.

    Practical Benefits

    Imagine going to the gym, swimming, or enjoying a meal without ever worrying about your lipstick smudging or fading. A lip tattoo offers true smudge-proof, waterproof, and kiss-proof color. This convenience is a major draw, saving you precious time during your morning routine and eliminating the need for constant touch-ups throughout the day.

    Is a Lip Tattoo Right for You? Considerations Before the Procedure

    Before booking an appointment, it’s essential to determine if you are a good candidate and to do your homework. A successful outcome depends on proper preparation and choosing the right professional.

    Who is a Good Candidate?

    You are likely a great candidate for a lip tinting procedure if you have pale lips, an undefined border, or asymmetry you’d like to correct. It’s also perfect for active individuals or those who simply want the convenience of long-lasting lip color.

    Contraindications: Who Should Avoid Lip Tattoos?

    This procedure is not suitable for everyone. You should avoid getting a lip tattoo if you are:

    • Pregnant or breastfeeding.
    • Prone to keloid scarring.
    • Taking blood-thinning medication or Accutane.
    • Undergoing chemotherapy.
    • Extremely prone to cold sores. The trauma of the tattoo can trigger an outbreak of the herpes simplex virus. If you have a history of cold sores, it is mandatory to consult your doctor for an antiviral medication to take before and after the procedure to prevent an outbreak.

    Choosing the Right Artist and Salon

    Your results are only as good as your artist. When choosing a provider, look for an experienced cosmetic tattoo artist with proper licensing, insurance, and a proven portfolio of beautifully healed results. Studios like Hivivi specialize in creating natural-looking lip blush tattoos in a clean, professional environment — exactly what you need for safe, stunning outcomes.

    The Lip Tattoo Procedure: What to Expect

    Knowing what will happen before, during, and after your appointment can help ease any nerves and ensure you are properly prepared.

    Before Your Appointment: Preparation

    In the 24-48 hours before your session, avoid alcohol, caffeine, and blood thinners like aspirin or ibuprofen, as they can increase sensitivity and bleeding. Ensure your lips are well-hydrated and exfoliated in the week leading up to the appointment. If you have a history of cold sores, begin taking your prescribed antiviral medication.

    During the Procedure

    The appointment typically lasts 2-3 hours. It begins with a consultation where the artist will map out your desired lip shape. A topical numbing cream is then applied and left to sit for 20-30 minutes to minimize discomfort. Most clients report the sensation as a light scratching or vibration. The artist then uses a digital tool to carefully deposit the pigment in multiple passes. Your lips will be swollen and the color will appear intensely bright and dark immediately after – this is completely normal.

    Lip Tattoo Aftercare: Crucial for Optimal Healing and Longevity

    Proper aftercare is the most critical factor in achieving excellent color retention and preventing complications. The initial lip tattoo healing process takes about 7-10 days.

    The Healing Process: Day-by-Day Breakdown

    • Days 1-3: Lips will be swollen, tender, and the color will look very bold.
    • Days 4-7: The top layer of skin will begin to peel and flake. Do not pick at it! During this time, the color may seem to disappear in a “ghosting” phase.
    • Weeks 2-6: The color will gradually bloom and reappear, settling into its true, softer shade. The final result will be visible after about 4-6 weeks.

    Essential Aftercare Instructions

    For the first 10 days, keep your lips constantly moisturized with the recommended aftercare balm. Avoid getting them wet (outside of gentle cleaning), and steer clear of spicy foods, direct sun exposure, swimming, and strenuous exercise. Drink liquids through a straw and avoid kissing to prevent infection.

    Potential Risks and Side Effects of Lip Tattoos

    While generally safe when performed by a qualified professional, there are potential lip tattoo risks. Common temporary side effects include swelling, redness, and tenderness. More serious complications, though rare, can include infection from improper aftercare, allergic reactions to the pigment, or an outbreak of cold sores if pre-treatment wasn’t followed. Uneven color or scarring can also occur, which underscores the importance of choosing an experienced artist.

    Cost of Lip Tattoos and Longevity

    The cost of a lip tattoo can range from $400 to $1,200+, depending on the artist’s experience and your location. This price usually includes the initial session and a follow-up perfection session 6-8 weeks later. A lip blush tattoo typically lasts 1-3 years before requiring a color boost touch-up. Longevity is affected by your skin type, lifestyle, and sun exposure – using a lip balm with SPF is key to preserving your pigment retention.

    Lip Tattoo vs. Lip Fillers: Can You Have Both?

    Yes, you can have both! They serve different purposes: a lip tattoo adds color and definition, while lip fillers add volume and plumpness. They complement each other beautifully. The standard recommendation is to get fillers first, allow them to heal and settle completely (at least 4 weeks), and then proceed with your lip tattoo appointment.

    Frequently Asked Questions (FAQs) About Lip Tattoos

    • Is it painful? A topical numbing cream is used to make the process as comfortable as possible. Most clients describe the lip tattoo pain as mild and tolerable.
    • How long does it take to heal? The initial healing (peeling) takes about 7-10 days, but the color will take 4-6 weeks to fully settle and reveal its final shade.
    • Can I choose any color? Your artist will work with you to create a custom color that best compliments your skin tone and natural lip color for the most flattering result.
    • Will my lips swell? Yes, swelling is a normal part of the process and typically subsides within 24-48 hours. A cold compress can help.

    Conclusion: Embrace Your Perfect Pout

    A lip tattoo is a fantastic investment in yourself, offering the gift of time, convenience, and effortless beauty. By choosing a skilled lip tattoo artist and diligently following aftercare instructions, you can achieve a gorgeous, natural-looking pout that lasts for years. If you’re ready to wake up every day with perfectly tinted lips, this cosmetic procedure might be the perfect solution for you.  

  • Hello world!

    Welcome to WordPress. This is your first post. Edit or delete it, then start writing!